How-to Do A Well Disinfection
Why Disinfect?
Well disinfection can eliminate or reduce many different kinds harmful bacteria and viruses as well as harmless bacteria which can cause unpleasant taste and odors. However, disinfection will not correct water problems caused by chemical contamination from nitrate, fuels, pesticides, or other substances. Well disinfection should be performed under the following circumstances:
Safety Precautions
ELECTRICAL
EXTREME CAUTION is advised as you will be working with electricity and water! Potentially lethal voltages exist! If you are not acquainted with working with electricity, seek professional advice! Your safety precautions should include:
CHEMICAL
Severe eye damage may result from contact with chlorine, including bleach and highly chlorinated household water! Your safety precautions should include:
RESPIRATORY
Well pits pose an extreme hazard as they frequently contain a build-up of toxic gases or simply lack sufficient oxygen to sustain life!
Well Disinfection Procedure
Well disinfection can eliminate or reduce many different kinds harmful bacteria and viruses as well as harmless bacteria which can cause unpleasant taste and odors. However, disinfection will not correct water problems caused by chemical contamination from nitrate, fuels, pesticides, or other substances. Well disinfection should be performed under the following circumstances:
- When coliform bacteria are present in the water;
- After flooding of the well;
- After plumbing installation, e.g. softeners, sinks, filters;
- After casing or pump repairs - submersible types or other;
- When water taste or odor changes, e.g. from iron or sulfur reducing bacteria;
- As part of annual maintenance; or
- During startup of seasonal wells.
Safety Precautions
ELECTRICAL
EXTREME CAUTION is advised as you will be working with electricity and water! Potentially lethal voltages exist! If you are not acquainted with working with electricity, seek professional advice! Your safety precautions should include:
- Turn off all power to the pump before removing the well cap;
- While the power is off, examine for chaffed wire insulation or missing wire nuts and repair as necessary;
- Wear rubber soled shoes or boots, preferably waterproof.
CHEMICAL
Severe eye damage may result from contact with chlorine, including bleach and highly chlorinated household water! Your safety precautions should include:
- Warn users of the water to not drink or bathe in the water while chlorine is still present in the system;
- Do not leave bleach jugs within reach of children - ingestion of bleach is the most common toxic exposure for children in the U.S.; and
- Wear protective goggles or a face shield when working with the bleach.
RESPIRATORY
Well pits pose an extreme hazard as they frequently contain a build-up of toxic gases or simply lack sufficient oxygen to sustain life!
- DO NOT ENTER WELL PITS! Death can occur in even a shallow well pit. Refer disinfection of wells in pits to licensed well or pump contractors.
Well Disinfection Procedure
STEP 1 - Isolate critical areas
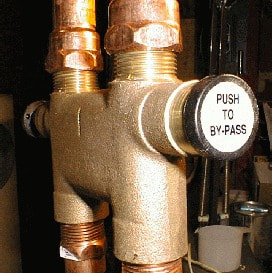
Bypass devices such as softeners, bait tanks, & livestock to prevent damage to the device or animals. This would also be a good time to install a new filter element if the water system has one. Since softeners themselves may be a source of contamination, it is good to disinfect the softener at the same time the well is being disinfected. See the end of this document for a softener disinfection procedure.
Bypass devices such as softeners, bait tanks, & livestock to prevent damage to the device or animals. This would also be a good time to install a new filter element if the water system has one. Since softeners themselves may be a source of contamination, it is good to disinfect the softener at the same time the well is being disinfected. See the end of this document for a softener disinfection procedure.
STEP 2 - Electrical safety
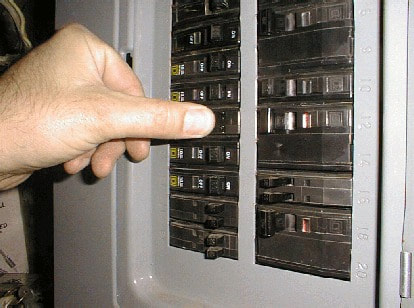
Turn off electrical power to the pump. If the breaker box has a “lockout” hasp to prevent someone from accidentally turning on the water pump circuit breaker, use it.
Turn off electrical power to the pump. If the breaker box has a “lockout” hasp to prevent someone from accidentally turning on the water pump circuit breaker, use it.
STEP 3 - Remove well seal/cap
With electrical power off, remove the well cap and lift the wires/wire nuts aside.
With electrical power off, remove the well cap and lift the wires/wire nuts aside.
STEP 4 - Mixing a chlorine solution
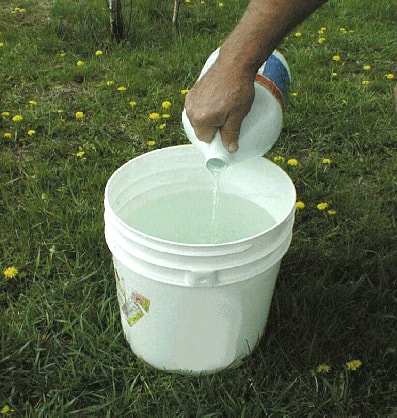
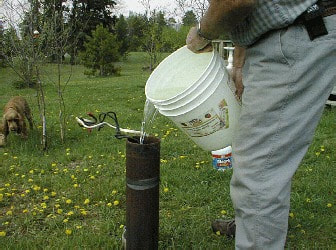
Add ½ of 1 gallon of bleach to a clean pail with about 3 gallons of water. This is generally sufficient to disinfect a 4 inch diameter well 100 feet deep or less.
For wells greater than 100 feet, increase the amount of bleach proportionately. Or, to determine the amount of water in the well multiply the gallons of water per feet by the number of feet of water in the well using the following table:
~Well Diameter Multiply Gallons/Foot
4 inches X 0.65
5 inches X 1.00
6 inches X 1.50
8 inches X 2.60
10 inches X 4.10
12 inches X 6.00
For each 100 gallons of water in the well use the amount of compound listed:
Laundry Bleach (5.25% Chlorine): 3 cups (24 ounces) OR
Hypochlorite Granules (70% Chlorine): 2 ounces (2 tablespoons)
STEP 5 - Adding chlorine to the well
Pour the mixture into the well.
Pour the mixture into the well.
STEP 6 - Recirculating chlorinated water
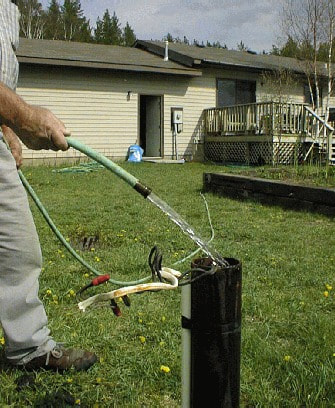
Recirculation of chlorinated water helps to wash down the sidewalls of the well casing, mix the water column thoroughly, and distribute the chlorine.
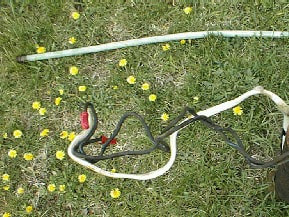
• Place garden hose into well casing.
• Turn on pump power.
• Run garden hose from the water system and put it back into the casing to recirculate water.
Recirculate for about 2 hours from the time you smell chlorine from the garden hose. You may notice that the water coming from the garden hose turns reddish for a brief period. This is due to the chlorine precipitating iron in the water. If the water appears excessively red and cloudy from this reaction, discharge the hose outside of the casing until the water runs clear.
STEP 7 - Bringing chlorine to each faucet
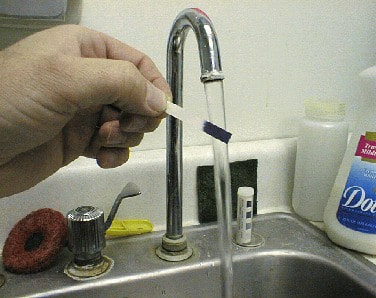
While water is circulating, turn on each faucet* one at a time until you smell bleach (or use chlorine test papers**), then close the faucet. Do this for each faucet, including:
*Faucet aerators may need to be removed if clogging occurs from precipitated iron.
**Chlorine test papers, such as those commonly used in restaurants to check chemical sanitizing dishwashers, are not necessary but provide a visual indication that chlorine is present.)
While water is circulating, turn on each faucet* one at a time until you smell bleach (or use chlorine test papers**), then close the faucet. Do this for each faucet, including:
- hot water taps;
- toilets and shower/bath fixtures;
- any outside faucets or yard hydrants
*Faucet aerators may need to be removed if clogging occurs from precipitated iron.
**Chlorine test papers, such as those commonly used in restaurants to check chemical sanitizing dishwashers, are not necessary but provide a visual indication that chlorine is present.)
STEP 8 - Removing the chlorinated water
Let system set overnight with chlorine in the water lines. In the morning, run a garden hose to flush out the system.
When a chlorine test kit is unavailable, wait a few days after the last trace of chlorine odor has dissipated before submitting a water sample for coliform analysis. This will ensure a valid test result.
Disinfection Issues
Expectations and Concerns
It may take as little as ½ hour or as much as 4 days to completely remove the chlorine odor from the water system. This is dependent upon many factors including: the height of the water column in the casing, well drawdown, and pump capacity. To facilitate faster removal of the chlorine in stubborn cases, a hose splitter may be attached and one hose run back into the casing and the other hose pumped to remove waste.
Water heaters take a long time to flush out once chlorine has been introduced into them. Do not shower/bathe with water containing high levels of chlorine due to the possibility of damaging your eyes. If you elect to drain down the water heater to remove the chlorine, be sure to turn off the electricity or gas to the heater otherwise the heater will be damaged when the water recedes from the heating elements or burner.
It is not unusual to require 2, 3, 4, or more disinfections to clear water systems of coliform bacteria that have been growing in the system for a period of time. If the well refuses to clear, a licensed well driller should be enlisted to utilize special techniques and equipment to flush the well. It is essential that any water system defects that could allow surface water to enter the well be corrected.
Plumbing grit and precipitated minerals may form when the chlorine is added to the system. This grit can cause clogging with faucet aerators, flush valves, water solenoids, and equipment using filters.
Softener Disinfection
Water softeners may be damaged by excessive amounts of chlorine but the softener itself should be chlorinated when there are bacteria problems. Follow the manufacturer’s instructions for disinfecting the particular unit you have or use this procedure:
• During the disinfection process, turn softener to ‘Bypass’ once chlorine is first smelled in a softened water tap.
• Keep unit on bypass until chlorine is flushed out of the system.
• To disinfect the softener, add ½ cup bleach to the brine tank and regenerate the unit.
Follow-up
Frequently, coliform bacteria will regrow in the water system after about a month. For this reason, it is important to retest approximately 30 days after disinfection. If coliform is again detected, disinfect the well using the same procedure.
Let system set overnight with chlorine in the water lines. In the morning, run a garden hose to flush out the system.
- Since chlorine will kill vegetation, direct the water to an area where it won’t matter if plants are harmed.
- Do not run the water into your septic system as the amount of water required to flush the system may hydraulically overload the septic system.
- TOTAL chlorine must be absent prior to taking water samples for coliform analysis. While this test isn’t necessary for the homeowner, be aware that any amount of chlorine left in the system may erroneously result in a negative coliform test.
When a chlorine test kit is unavailable, wait a few days after the last trace of chlorine odor has dissipated before submitting a water sample for coliform analysis. This will ensure a valid test result.
Disinfection Issues
Expectations and Concerns
It may take as little as ½ hour or as much as 4 days to completely remove the chlorine odor from the water system. This is dependent upon many factors including: the height of the water column in the casing, well drawdown, and pump capacity. To facilitate faster removal of the chlorine in stubborn cases, a hose splitter may be attached and one hose run back into the casing and the other hose pumped to remove waste.
Water heaters take a long time to flush out once chlorine has been introduced into them. Do not shower/bathe with water containing high levels of chlorine due to the possibility of damaging your eyes. If you elect to drain down the water heater to remove the chlorine, be sure to turn off the electricity or gas to the heater otherwise the heater will be damaged when the water recedes from the heating elements or burner.
It is not unusual to require 2, 3, 4, or more disinfections to clear water systems of coliform bacteria that have been growing in the system for a period of time. If the well refuses to clear, a licensed well driller should be enlisted to utilize special techniques and equipment to flush the well. It is essential that any water system defects that could allow surface water to enter the well be corrected.
Plumbing grit and precipitated minerals may form when the chlorine is added to the system. This grit can cause clogging with faucet aerators, flush valves, water solenoids, and equipment using filters.
Softener Disinfection
Water softeners may be damaged by excessive amounts of chlorine but the softener itself should be chlorinated when there are bacteria problems. Follow the manufacturer’s instructions for disinfecting the particular unit you have or use this procedure:
• During the disinfection process, turn softener to ‘Bypass’ once chlorine is first smelled in a softened water tap.
• Keep unit on bypass until chlorine is flushed out of the system.
• To disinfect the softener, add ½ cup bleach to the brine tank and regenerate the unit.
Follow-up
Frequently, coliform bacteria will regrow in the water system after about a month. For this reason, it is important to retest approximately 30 days after disinfection. If coliform is again detected, disinfect the well using the same procedure.

